How do you securely hang outdoor curtains to create a comfortable, private space? You can mount them using sturdy rods, tensioned steel cables, ceiling tracks, or simple no-drill options to ensure they stay put in variable weather.
Choosing the right method helps you upgrade your outdoor spaces while enjoying effective sun protection and privacy all season long.
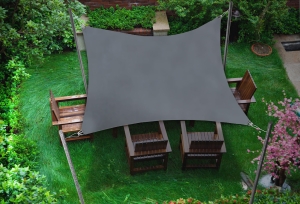
Why Hang Outdoor Curtains?
Outdoor curtains do more than look beautiful. They add real function to your outdoor spaces and make them much more enjoyable to use. They blend comfort with modern design, offering several practical benefits.
Improves Privacy and Comfort in Outdoor Spaces
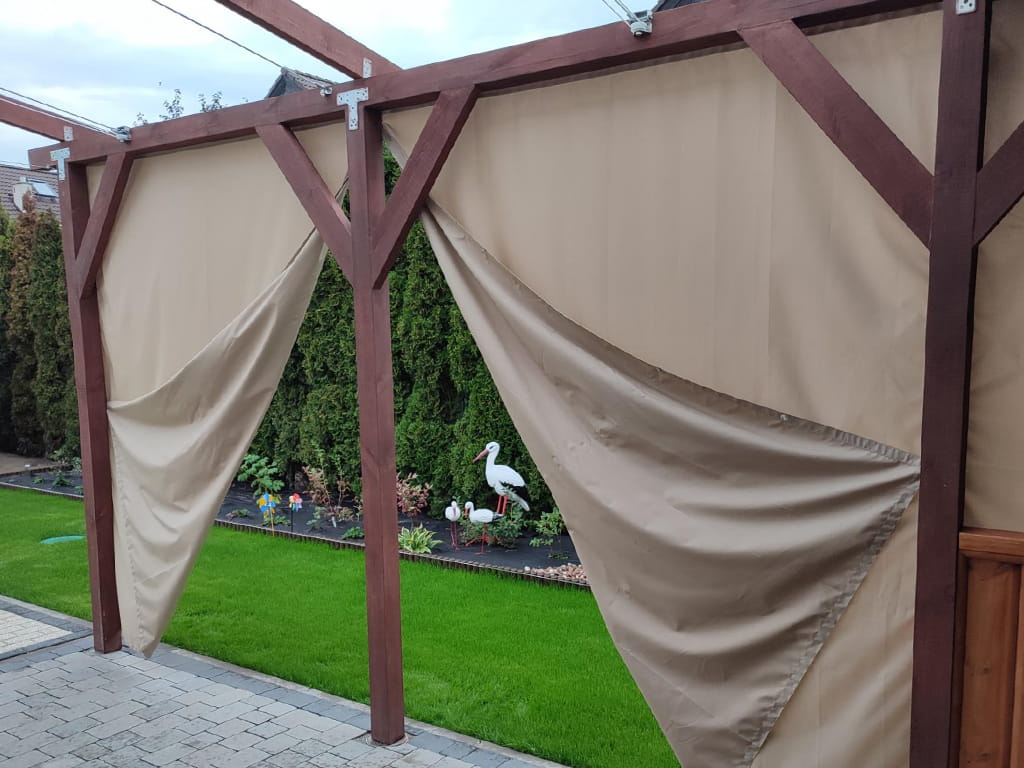
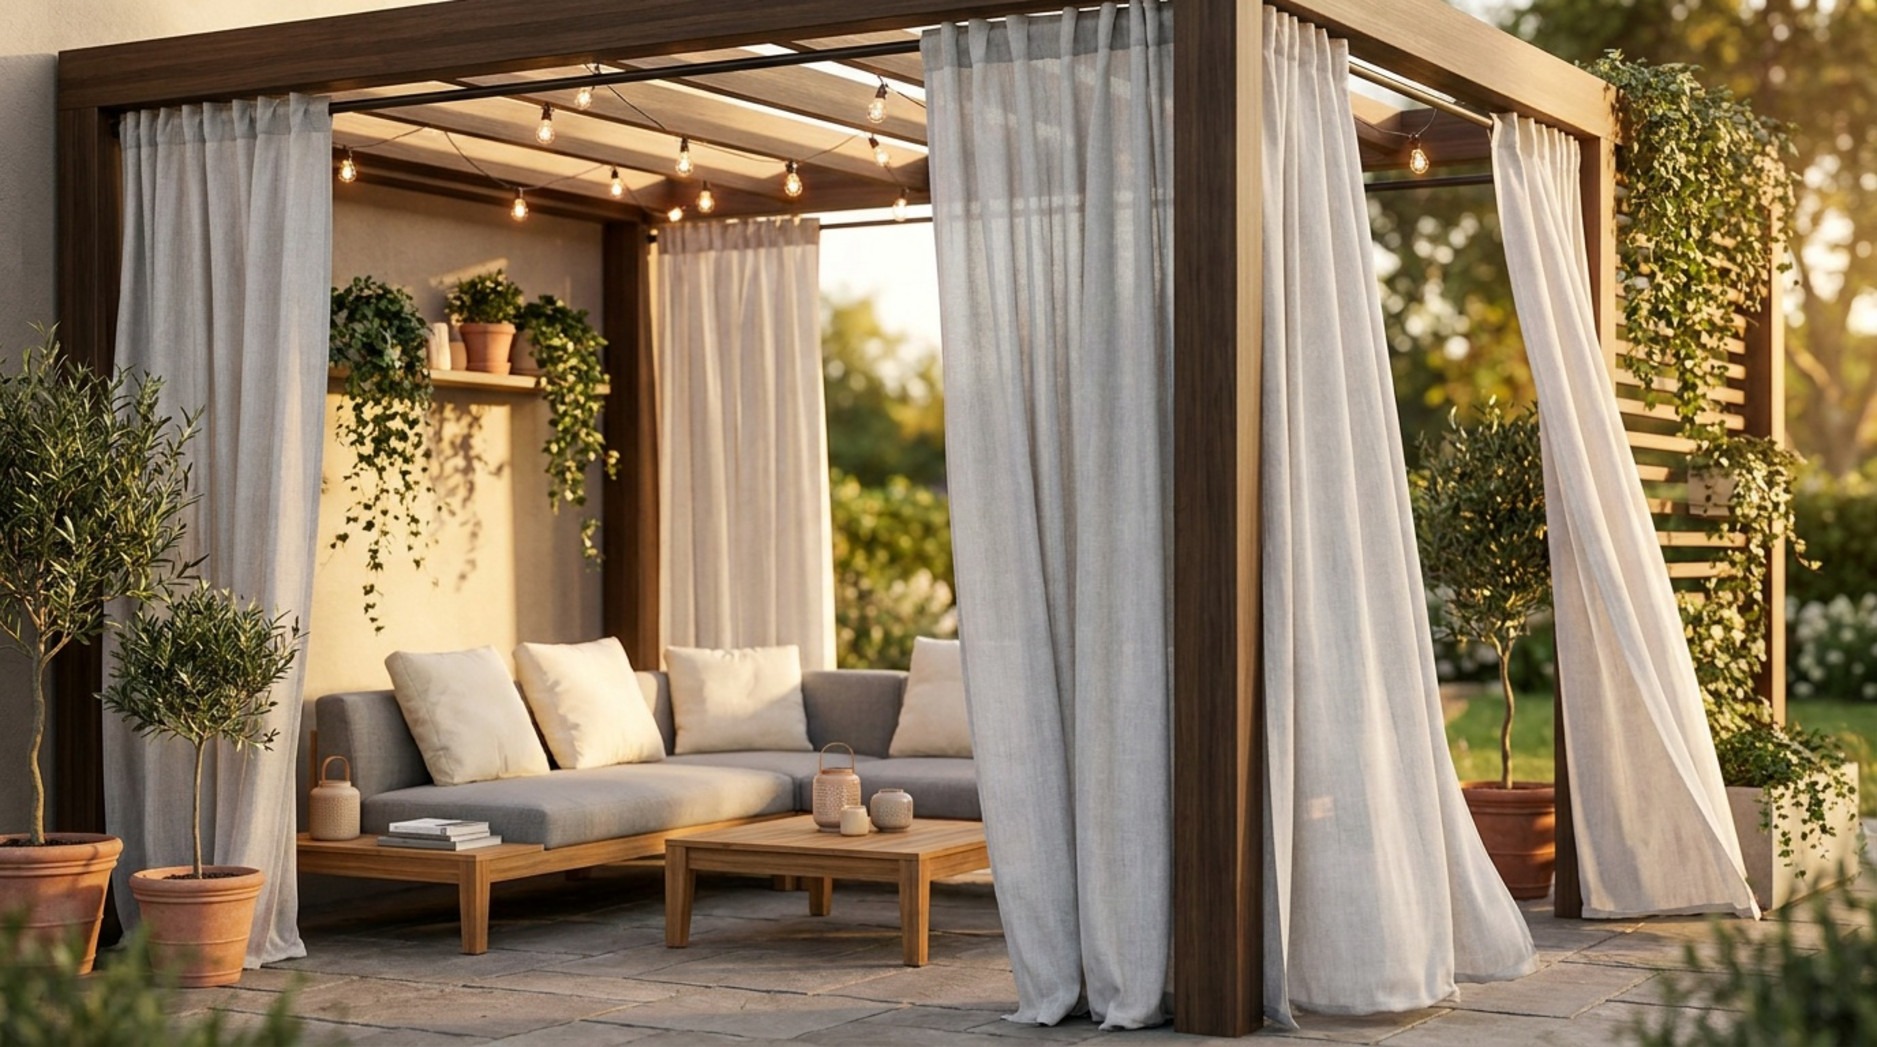
If you want to relax outside without feeling exposed to neighbours, outdoor curtains help establish privacy quickly. They enclose an open patio, turning it into a peaceful, protected space. They also help frame the area so it feels like a natural extension of your home.
Curtains soften the look of hard wooden posts and metal beams. When the high-quality materials move gently in the breeze, it creates a calm and inviting environment right in your own garden.
Protects Against Sun, Wind, and Bugs
Outdoor curtains act as a barrier against the elements. On hot days, they provide effective sun protection, reduce glare, and keep the seating area cooler. Top-quality outdoor fabrics feature excellent UV resistance, which protects your skin and stops your garden furniture from fading.
If your garden is exposed to the breeze, curtains cut down the draughts and make the area feel much cosier. While they will not stop every single insect, keeping them drawn helps reduce bugs during outdoor meals or evening gatherings.
Adds Style and Mood
Outdoor curtains quickly refresh the look of a patio or pergola. They add colour, texture, and movement. You can choose lightweight panels for an airy feel, or thicker, weather-resistant materials for a modern, structured look.
They help your space feel complete. The way light filters through the fabric makes the entire area feel relaxed and welcoming.
Key Factors to Think About Before Hanging Outdoor Curtains
Before you start your installation, a little planning goes a long way. Checking a few basic details ensures your outdoor comfort lasts and your setup remains secure.
1. UV Protection and Weather Resistance
Outdoor elements can be harsh on standard fabrics. Sun, rain, and damp conditions quickly cause fading or mildew if the curtains are not built for outside use.
Always choose curtains clearly designed for outdoor spaces. These feature built-in UV protection and are made to handle variable weather.
Look for water-resistant finishes and breathable fabrics, especially if you live in a damp or rainy region. Investing in high-quality materials upfront means your shading solution looks fantastic season after season.
2. Choosing the Right Fabric and Curtain Features
Outdoor curtains come in various durable materials, including solution-dyed acrylic and tough outdoor canvas. Lighter fabrics allow pleasant airflow, whilst thicker materials provide stronger shade and maximum privacy.
Check the header style too, as this affects how smoothly they open and close:
-
Grommet tops: Easy to slide, offering a clean, modern design.
-
Tab tops: Casual style that is very easy to hang.
-
Rod pockets: Provide a gathered look but do not slide as freely.
-
Back tabs: Give a neat pleated finish that works brilliantly with standard rods.

3. Measuring for Proper Length and Width
Accurate measurements are essential for a great fit. Decide if you want your curtains to touch the floor, sit just above it, or pool slightly. Keeping them a few centimetres off the ground stops them from soaking up puddles or gathering dirt.
Measure from your mounting point down to the desired hemline, checking in multiple spots since patios are rarely perfectly level.
For width, outdoor curtains look best with a bit of fullness. A simple rule is to order 1.5 to 2 times the width of the space you want to cover. For a richer, fuller look, go up to 2.5 times the width.
4. Weight and Wind Control
Wind is a common challenge in any garden. Lightweight curtains blow around easily, whilst heavier ones stay grounded. Think about how you will secure them from the start. Weighted hems, heavy-duty tie-backs, or running a second cable system near the bottom are all excellent choices.
If your location is particularly breezy, opt for heavier, weather-resistant materials and a robust hanging method to keep everything secure.
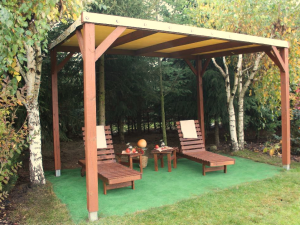
5. Fit for Different Outdoor Structures
Your structure determines the best installation method. A wooden pergola provides excellent anchor points for rods or cables. A covered porch ceiling pairs beautifully with a sliding track. Balconies might need wall-mounted fittings, whilst metal gazebos often work nicely with tension rods.
Check your posts, beams, and walls to ensure they are strong enough to support both the weight of the fabric and the metal hardware.
Shop outdoor curtains made to measure →
Materials and Tools Needed for Hanging Outdoor Curtains
Gathering your supplies beforehand makes any DIY project smoother. Here is exactly what you need to set up your outdoor shading.
Must-Have Materials
-
Outdoor curtains: Specifically manufactured for outdoor spaces, featuring UV resistance and weather-resistant materials.
-
Hanging system: Choose based on your preferred method:
-
Outdoor curtain rods: Rust-resistant (stainless steel, aluminium, or treated wood).
-
Brackets: Sturdy and rated for outdoor conditions.
-
Steel cable/wire kit: Wire, turnbuckle/tensioner, eye bolts/hooks, and clips.
-
Ceiling track/rail system: Track lengths plus outdoor-rated gliders.
-
Rope or tension rods: For simple or no-drill setups.
-
Fasteners: Outdoor-rated screws, bolts, or anchors suited for your surface (wood, masonry, or metal).
-
Tie-backs or bungees: To hold panels open and stop them from flapping in the wind.
-
Optional: Curtain weights or a bottom cable to anchor the fabric securely.
Recommended Tools
-
Measuring tape
-
Pencil or marker
-
Level: Helps keep your installation perfectly straight
-
Drill: With bits matched to your specific surface
-
Screwdriver (or drill driver bits)
-
Ladder or step stool
-
Wire cutters and pliers (if using cable systems)
-
Safety glasses
4 Foolproof Methods to Hang Outdoor Curtains
These four installation techniques suit different styles, structures, and DIY skill levels. One of these will definitely work for your patio, pergola, or balcony space.
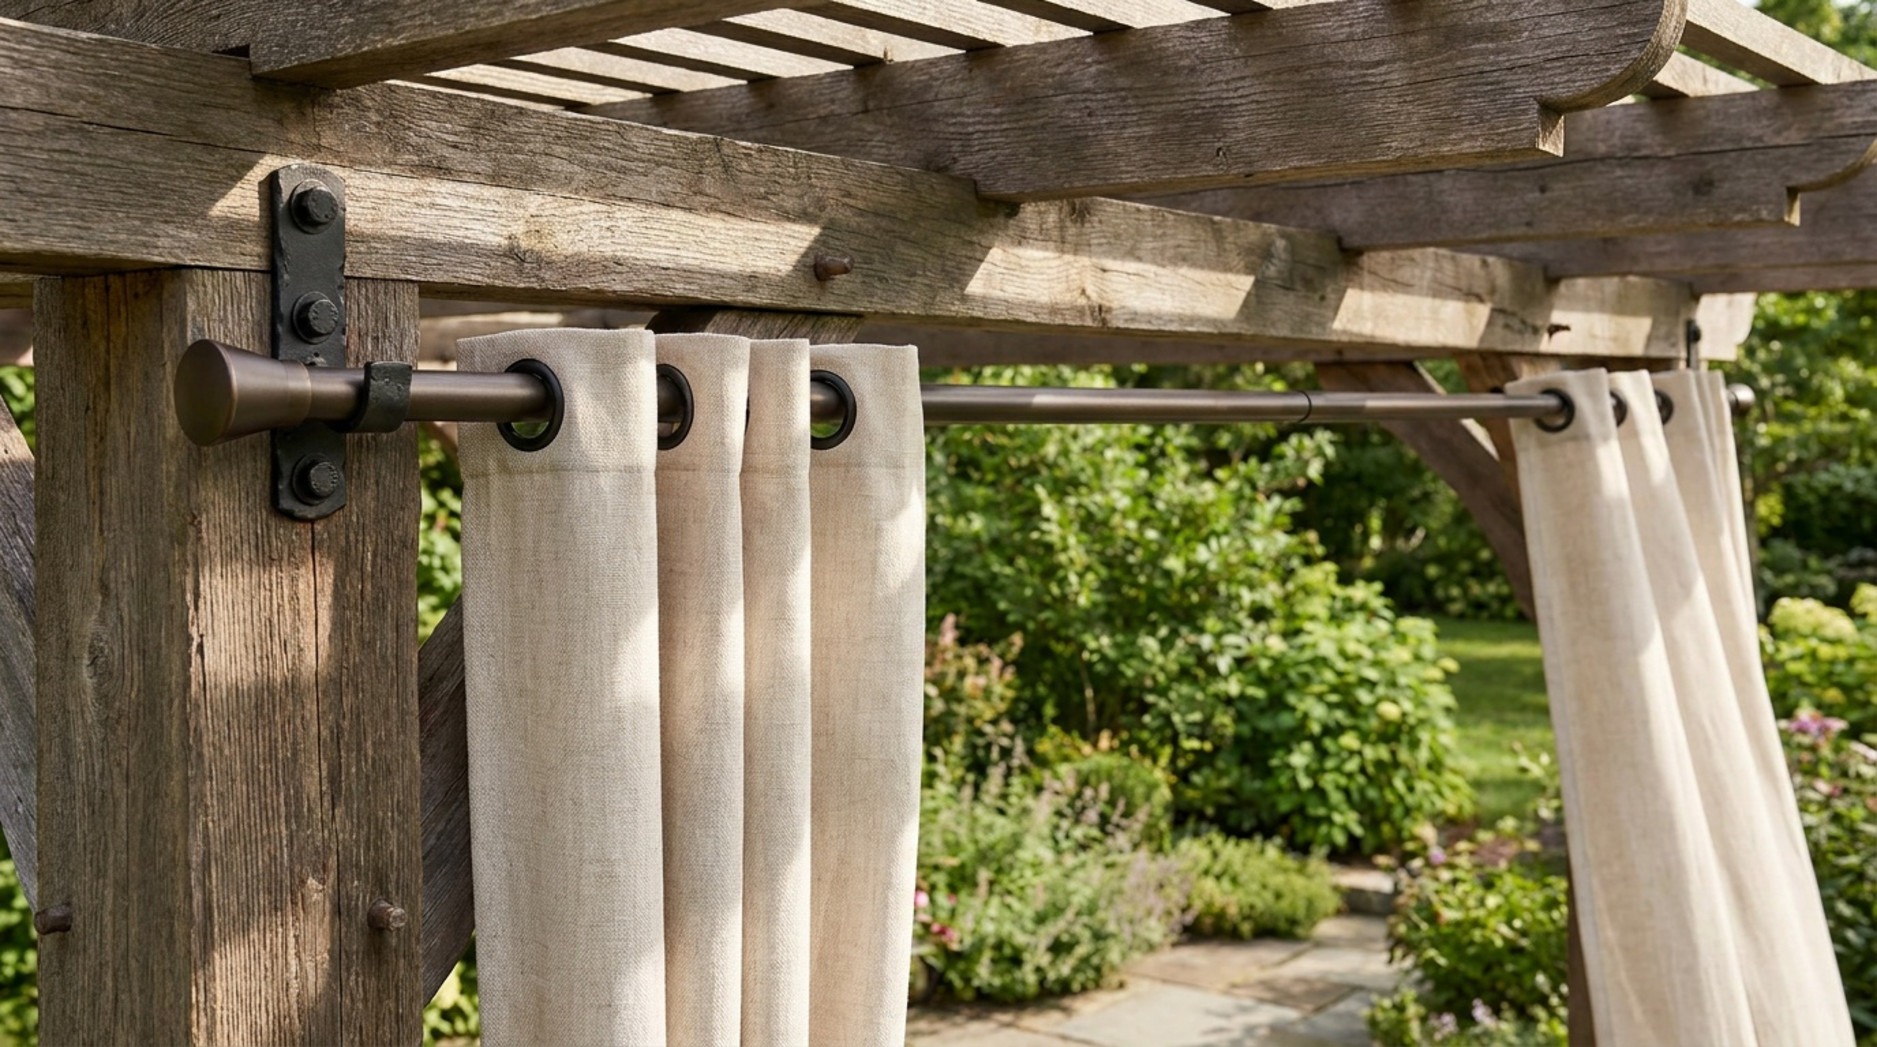
1. Curtain Rod and Bracket Method
This is the most traditional method. It delivers a clean, familiar look and stands up well to daily use when mounted correctly. It safely supports heavier, high-quality materials, too.
Where to Use Curtain Rods
Curtain rods are ideal for covered patios, porches, and wooden pergolas where you can screw brackets directly into solid beams. This method feels robust and helps divide large outdoor spaces into cosy, functional zones.
For very wide spans or highly exposed areas, a single rod might bow. Be sure to use a thick, sturdy rod and add extra support brackets in the middle.
Steps to Install Curtain Rods
-
Measure and mark: Hold a curtain up to determine the correct height. Mark your bracket spots with a pencil, using a level to ensure both sides align perfectly.
-
Drill pilot holes: Drill carefully into your marks. Insert rawlplugs or anchors if fixing into masonry or hollow materials.
-
Attach brackets: Screw the brackets in tightly so they securely hold both the rod and the fabric's weight.
-
Insert rod and hang curtains: Thread the curtains onto the rod, place the rod into the brackets, secure the end caps, and give it a gentle tug to test stability.
2. Steel Cable or Wire System
A tensioned steel cable provides a sleek, modern design and is often more cost-effective than extra-long rods. It spans wide gaps beautifully because the turnbuckle keeps the wire completely taut.
Best Applications for Cable Systems
Cables are brilliant for open pergolas and gazebos where you want the mounting hardware to look minimal and unobtrusive. They allow outdoor curtains to glide smoothly while keeping the space feeling light.
This approach easily prevents the sagging issue you sometimes get with long wooden or metal rods.
Step-by-Step Cable Installation
-
Attach eye hooks/plates: Mark level points on facing supports. Screw in the eye hooks or mounting plates tightly.
-
Thread the cable: Pass the wire through one eyelet. Create a loop and secure it firmly with your kit's crimps or clips.
-
Add curtains and tensioner: Slide your curtain rings or clips onto the wire. Next, loop the other end of the wire through the second eyelet, attaching it to the turnbuckle.
-
Tighten and secure: Twist the turnbuckle until the steel cable is fully taut. Check that the fabric glides easily and the posts are not bowing under the tension.
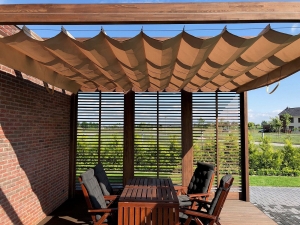
3. Ceiling Track or Rail Method
If you want panels that slide effortlessly and overlap to block out the elements, a ceiling track is an outstanding choice. It allows you to neatly stack the fabric out of the way when not in use.
Using Ceiling Tracks for Flexible Coverage
Tracks mount beautifully under covered patios, robust pergolas, or balcony ceilings. You can pull them wide open for an airy feel, or draw them shut for total privacy and effective sun protection.
While popular in commercial settings like cafes, they are fantastic for residential gardens because they look great and function brilliantly.
This setup is perfect if you like adapting your outdoor spaces depending on the weather or time of day.
Ceiling Track Installation Steps
-
Plan the track path: Decide exactly where the rail will run. Measure and mark your drilling points, using a long level or chalk line to keep the path straight.
-
Mount the track: Fasten the track to the ceiling using appropriate anchors for your material. If joining multiple rail sections, align the seams carefully so the gliders do not catch.
-
Insert gliders: Slide the roller carriers into the track and test that they run smoothly from end to end.
-
Attach curtains: Hook your panels onto the gliders, sliding them back and forth to ensure everything works flawlessly.
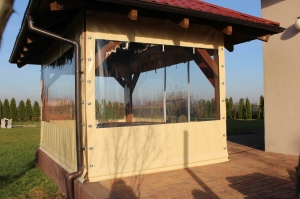
4. Rope and No-Drill Techniques
If you rent your home, need a temporary setup, or simply do not want to drill holes, rope and tension rods are fantastic alternatives, especially for lightweight materials.
Hanging Curtains With Rope or Tension Rods
A thick, weather-resistant rope adds a lovely rustic charm. Simply tie it tautly between two sturdy posts, threading grommet curtains directly onto it. It is quick to install and easy to take down.
Tension rods are superb for smaller, enclosed spaces, such as between porch pillars or inside a balcony alcove. You just twist the rod until it wedges tightly between the walls, then hang your curtains. Zero drilling is required.
No-Drill Options for Renters
If drilling is out of the question, you still have highly practical options:
-
Outdoor adhesive hooks: Brilliant for smooth surfaces like vinyl or painted metal. Always check the weight limits before hanging.
-
Magnetic hooks: Ideal for metal gazebo frames. They are incredibly easy to position and remove as needed.
-
Outdoor command strips: Suitable only for very light, sheer fabrics. Test them first to ensure they hold the weight.
When using no-drill methods, lighter fabrics are always the safest choice.
Tips for Preventing Outdoor Curtains from Blowing in the Wind
Wind is the biggest challenge for outdoor fabrics. These simple steps keep your curtains neatly under control rather than flapping wildly across the patio.
Weighted Hems and Bottom Cable Systems
Adding weight to the bottom hem makes a massive difference. Some high-quality outdoor curtains come with weighted bottoms built-in. If yours do not, you can insert specific curtain weights or stitch a slim galvanised chain inside the bottom hem. Removable magnetic weights are also a great quick fix.
For maximum stability, run a second taut cable through the bottom grommets. This anchors the panels, ensuring durability in variable weather without restricting their ability to slide open.
Using Tie-Backs and Hooks
Tie-backs keep your curtains bundled neatly against the posts when you want to enjoy the view and fresh air. Use heavy-duty fabric straps, ropes, or magnetic clips made from weather-resistant materials.
If your garden is prone to strong gusts, install small anchor hooks near the base of your posts. You can hook the bottom corners of your curtains directly to them, or use small bungee cords to secure the fabric to heavy furniture or railings.
Caring for Outdoor Curtains: Cleaning and Maintenance
Quality outdoor accessories last much longer when you maintain them properly. A quick clean and regular hardware checks keep everything looking pristine and functioning safely.
Routine Cleaning Recommendations
Shake your curtains out regularly to remove dust, pollen, and debris. For a quick wash, simply spray them with a garden hose and lightly scrub any marks using mild soap and a soft sponge. Always rinse thoroughly to prevent soap residue from building up.
For a deeper clean, always read the manufacturer’s care label. Many durable outdoor fabrics can be machine washed on a gentle, cool cycle, or hand-washed in a large tub. Avoid bleach, as it breaks down the fabric's UV resistance.
Always let the curtains air dry completely before rehanging them to stop mildew forming.
Protecting Curtains During Harsh Weather
While high-quality materials are built for the outdoors, extreme storms can still cause damage. If heavy gales are forecasted, it is best to take the panels down. If that is not possible, gather and tie them back as tightly as you can to minimise wind strain.
During winter months, remove them entirely, clean them, dry them fully, and store them somewhere dry. This simple step adds years of life to your outdoor comfort setup.
Inspecting Hardware for Safety
As already mentioned in the installation steps, checking your hardware is just as vital as cleaning the fabric. Look over your rods, brackets, steel cables, and screws for any signs of rust, wear, or loosening.
Tighten loose bolts and replace worn parts immediately. A secure fixing system prevents accidents and ensures your outdoor spaces remain safe. Checking your hardware at the start and end of every summer is an excellent habit.
Final Thoughts: Choosing the Best Method for Your Space
There is no single perfect way to hang outdoor curtains. The best approach depends on your specific outdoor spaces, the structure you are attaching them to, and how you intend to use them.
Think carefully about your garden's layout, how much privacy you need, and your local wind conditions.
By choosing the right installation method and investing in high-quality materials from experts like Shade4You, you can easily create a beautiful, weather-resistant outdoor retreat that you will love spending time in.
Outdoor Curtain FAQs
These are the most common questions customers ask when looking to upgrade their garden shading.
Can Indoor Curtains Be Used Outdoors?
It is generally not recommended. Indoor fabrics lack UV protection and are not built for rain and humidity. They fade rapidly in the sun and easily develop mildew.
Dedicated outdoor curtains or custom shade sails are an investment in durability. They stand up to the elements and save you from having to replace them every few months.
How Long Do Outdoor Curtains Last?
Lifespan depends heavily on the fabric quality and how well you maintain them. Premium solution-dyed acrylic or robust canvas can last anywhere from 5 to 10 years if cleaned regularly and stored over winter. Budget polyester might only last 2 to 4 years.
Regular care and protection during severe weather dramatically increase their longevity.
What Makes a Curtain Weatherproof?
Weather-resistant outdoor materials typically feature:
-
UV protection to block harmful rays and prevent colour fading.
-
Water resistance to stop rain from soaking deeply into the fibres.
-
Mildew resistance to protect against damp and humid air.
-
High-quality materials woven tightly to handle wind and daily outdoor use.
Total reviews: 18 reviews