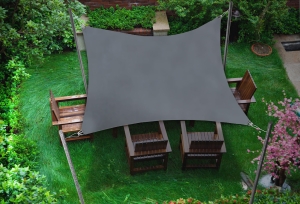
The right shade makes outdoor dining actually enjoyable instead of something you endure while squinting and sweating. Custom sun sails offer a clean, modern solution that protects your dining area without the bulk of traditional structures.
Why Sun Sails Work Better Than Other Shade Options
Traditional patio umbrellas block your view, need constant adjustment as the sun moves, and blow over in moderate wind. Pergolas cost thousands and take weeks to build. Sun sails provide targeted coverage exactly where you want it, and they handle wind by flexing rather than fighting it.
The fabric blocks up to 95% of UV rays depending on the weave density. This means you get actual sun protection, not just a visual barrier. Your skin stays safer and the table doesn't turn into a heat trap during lunch. Food and drinks don't warm up as quickly either, which matters more than people realize during summer meals.
Standard shade sails come in set sizes that fit common spaces well enough. Made to measure options let you cover odd-shaped patios or work around existing structures perfectly. The difference shows when every corner of your dining table gets equal shade instead of having one side in full sun.
Positioning For Maximum Coverage
Where you mount your sun sail matters as much as its size. The sun moves across the sky at different angles depending on the season and your location. Think about when you actually use your outdoor dining space. Morning coffee drinkers need eastern coverage while dinner crowds want western shade.
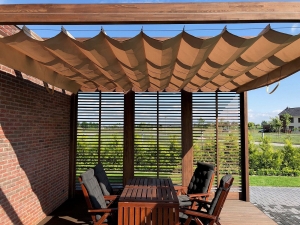
Mounting at different heights creates that appealing curved look and helps with water drainage. A completely flat sail collects rainwater in the middle, which stresses the fabric and hardware. Aim for about a foot of height difference between the highest and lowest mounting points.
Consider these placement factors:
- Existing structures (house walls, posts, trees) for anchor points
- Wind patterns in your yard throughout the day
- Sight lines from inside your home and seating areas
- Clearance for people walking underneath
- Distance from grills or fire pits to avoid heat damage
Trees make tempting anchor points but they grow and move with wind more than you might expect. A sturdy post or building attachment stays put better. If you do use a tree, inspect the connection points regularly and allow extra slack for branch movement.
Choosing The Right Shape and Size
Triangular sails offer three mounting points that work well in corners or against walls. Square and rectangular shapes need four anchor points but cover more area with less waste. Measure your dining table with chairs pulled out to get the actual footprint you need to shade. Add at least 3 feet on all sides for comfort.
Overlapping multiple smaller sails creates interesting visual layers and gives you flexibility. You can adjust individual sections for different times of day or remove one during windier weather while keeping others up. This approach costs a bit more upfront but offers more control than a single large sail.
Color affects both appearance and performance. Lighter colors reflect more heat but show dirt faster. Darker shades hide stains better and create deeper shadows. Earth tones like sand, terracotta, or olive green blend with most outdoor settings without overwhelming the space. Bold colors make a statement but might clash with your home's exterior.
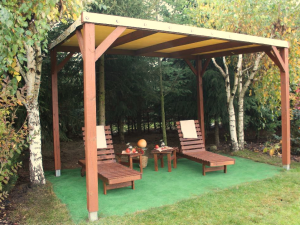
Installation Essentials
Strong attachment points are not optional. Each corner of your sail pulls with surprising force, especially during wind events. Wall mounts need to anchor into studs or masonry, not just siding. Freestanding posts should be sunk at least 2 feet deep with concrete for stability.
Turnbuckles or adjustable hardware at each mounting point let you fine-tune the tension. Proper tension keeps the sail taut enough to shed water and resist flapping without overstressing the fabric or attachment points. You want the surface tight but not drum-tight.
Most quality sun sails come with stainless steel hardware that resists rust. Check all connection points at the start of each season and tighten anything that loosened over time. A sail that pulls free during a storm can damage your property or someone else's.
Creating A Complete Dining Environment
Shade alone doesn't make a great dining space. Position your furniture to take advantage of the covered area while leaving room for people to move around comfortably. Side tables or serving carts benefit from shade just as much as the main dining table.
Lighting becomes important as the sun sets. String lights along the edges of your sail or hang a pendant from the center mounting point. The sail itself diffuses light nicely, creating ambiance without harsh glare. Solar options eliminate the need for running electrical lines.
Plants in pots around the perimeter define the dining zone and add life to the space. Choose varieties that thrive in partial shade since the sail blocks direct sun. Herbs like mint or basil near the table smell great and give you fresh ingredients right when you need them.
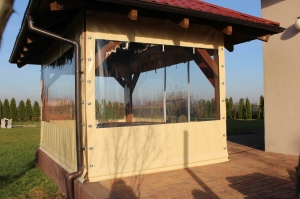
Want extra protection?
Add outdoor curtains as side panels
Maintenance Through The Seasons
Regular cleaning keeps your sail looking fresh. Brush off debris monthly and hose down the fabric when you notice dust buildup. Most sun sail materials handle gentle soap and water fine. Avoid pressure washers because the force can damage the weave or waterproof coatings.
Take down your sails before winter storms if you live somewhere with heavy snow or ice. The fabric itself might survive, but accumulated weight can bend hardware or pull mounting points loose. Spring installation is simple when you marked or photographed the attachment points before removing the sails.
Small repairs prevent bigger problems. Loose stitching near grommets can be reinforced with heavy-duty thread before it tears completely. Clean any mold or mildew spots immediately with a solution of water and white vinegar, then rinse thoroughly.
Design Ideas Worth Considering
Layer different heights and colors for a more dynamic look than a single sail provides. A tall sail over the center of your dining table with lower sails extending the coverage creates interesting depth. Just make sure the different sections don't interfere with each other in the wind.
Curved edges (hyperbolic sails) add visual interest and improve water runoff compared to straight edges. They're available at the same price point as straight-edged sails, making them an attractive option for any outdoor space, particularly focal areas like dining spaces. The curves also help with wind performance by allowing some give in strong gusts.
Planning For Success
Start with your daily patterns rather than trying to shade everything. Focus coverage on when and where you actually eat outdoors. You might need different positioning for breakfast versus dinner, or weekend brunches versus weekday lunches. Sometimes two smaller sails serve you better than one large one because you can adjust each independently.
Mock up your plan with string or rope before committing to hardware installation. This lets you see how the coverage works at different times of day and adjust the design before drilling holes. Take photos from various angles to spot potential issues with the layout.
Sun sails transform ordinary patios into spaces you'll actually want to use during warm weather. The installation takes some planning, but the result is years of comfortable outdoor meals under elegant, functional shade. Your dining table becomes a destination rather than just a place to eat when you can sit there comfortably at any hour.
Total reviews: 18 reviews