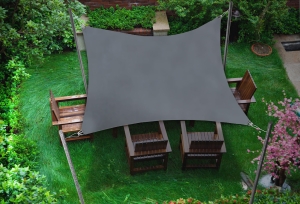
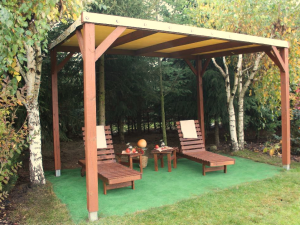
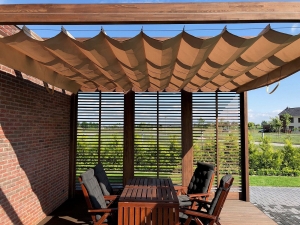
A shade sail is a stylish and functional accessory for any outdoor space. Whether you're looking to cool down your conservatory, create a shady retreat in your garden, or provide respite from the sun on your patio, understanding how to install a shade sail is crucial.
In this comprehensive installation guide, we present a step-by-step approach to ensure a successful installation. We cover everything from planning to final tension adjustments.
Let's dive in.
1. Strategic Planning for Your Shade Sail
Before you even think about tools and fixings, you need to consider where you want to place your shade sail. There's no getting around it — planning is essential for a successful installation.
This stage determines the effectiveness and longevity of your shade structure, so don't take shortcuts. Instead, spend some time carefully pondering over your decision.
Assessing the Area to Be Covered
Start by assessing the area to be covered. Consider the path of the sun throughout the day. Where is the shade most needed? Note these points.
Additionally, think about how the shadow will move during the day. You might want morning sun but afternoon shade, or vice versa.
Creating a shaded area in the centre of your garden might be tempting, but is it the option for you? Maybe extending a couple of triangular sun shades over your patio will work be worth the while?
The beauty of a bespoke design is that it allows you to cater to these very specific needs. Our made-to-measure sun shades are a versatile solution that you can use virtually everywhere in your outdoor space.
A well-placed sail shade can significantly reduce the sun's intensity, making your garden or conservatory far more enjoyable.
Finding a Suitable Fixing Point and Poles
The corner of the shade sail needs secure fixing points. You can rely on existing structures, such as walls and sturdy trees, or purpose-built poles.
Leveraging Existing Structures
Mounting a shade sail on existing structures like walls, fences, or sturdy trees can be a cost-effective and aesthetically pleasing option.
Before mounting the sail, inspect existing structures for their load-bearing capacity. Are they strong enough to withstand the tension of the sail in windy conditions? Walls and fences should be solid, and trees should be mature and healthy.
Consider the potential for movement, especially with trees, as swaying can place undue stress on the sail and its fixings.
- Wall Mounting: Use appropriate fixings, such as expansion bolts for concrete or brick walls, ensuring they are deeply anchored and capable of withstanding the tension of the sail. Consider using fascia support brackets to distribute the load and prevent damage to the wall. If the walls are weatherboard or similar, you will need to fix them directly into the wooden support.
- Fence Integration: Fences can provide a convenient fixing point, but they must be sturdy enough to handle the load. Reinforce the fence posts with additional concrete or bracing if necessary.
- Tree Attachment: When attaching to trees, use tree straps or ropes to avoid damaging the bark. Regularly inspect the straps to ensure they are not constricting the tree's growth. If the tree moves violently, it will wreak havoc on your sail.
Using Purpose-Built Poles
When existing structures are not suitable or unavailable, purpose-built poles offer a versatile and reliable solution. Metal poles or wooden posts, properly installed, provide a strong and stable fixing point for your shade sail, allowing for greater flexibility in design and placement.
- Material Selection: Choose high-quality materials that are resistant to corrosion and weathering. Metal poles are generally made from galvanised steel or aluminium, while wooden posts should be pressure-treated to prevent rot. Consider the aesthetic appeal of the poles and how they will complement your garden or outdoor space. Powder-coated poles offer a range of colours and a durable finish.
- Proper Installation: Dig holes for the poles to a depth of at least one-third of their total length and set them in concrete for maximum stability. Ensure the poles are plumb (perfectly vertical) and that the concrete is properly cured before attaching the sail. Gravel at the base of the hole will help with drainage. Concrete at the bottom will increase strength.
- Strategic Placement: Carefully consider the placement of the poles to maximise shade coverage and create the desired aesthetic effect. The height of your fixing points also matters. Lower points will result in more shade at ground level, while higher points allow for greater airflow and a more open feel.
Considering the Slope
In most cases, you will need to ensure adequate rainwater runoff from your sail. Without a slope, water can pool on the fabric, leading to sagging, potential damage, and reduced lifespan.
Aim for a minimum slope of 30 degrees to allow water to drain effectively. Ensure at least one corner is lower than the others to facilitate drainage.
2. The Step-By-Step Installation
With planning complete, it's time for the actual installation. This is where your preparation pays off, as a well-thought-out plan translates to a smooth and efficient process.
Setting up Wooden Posts and Metal Poles
If you're using poles, begin by digging holes for them. The depth will depend on your space and the size of the sail. As a general rule, aim for at least a third of the poles' total length to be buried. Concrete at the bottom provides extra stability, particularly on soft ground.
- Dig the Hole: The width should be three times the diameter of the pole.
- Pour Concrete: Add about 15cm of concrete at the bottom of the hole to provide a solid pad for the base of the post.
- Position the Post: Insert the wooden post, ensuring it is plumb (perfectly vertical).
- Backfill With Concrete: Fill the remainder of the hole with concrete, ensuring the base of the post is fully encased. Consider using quick-setting concrete for faster results.
- Tamp and Finish: Tamp the concrete down firmly and create a slight slope away from the post to encourage rainwater runoff.
Allow the concrete to cure fully before proceeding (usually 24-48 hours). If you are using metal poles, the process is the same, although you may want to consider welding braces to the bottom before inserting them in the ground to better lock them in.
Attaching the Fixings to Existing Structures
When attaching to existing structures, use appropriate fixings.
- For brick or concrete walls, use expansion bolts.
- For wooden posts, use heavy-duty screws or bolts.
Ensure the fixings are rated to handle the tension of the sail. Pad eyes are ideal fixings on a house or existing structure, as they are incredibly strong.
If you want to fix your shade sail in place without much effort, check out our assembly kits. These kits have everything you need to complete the installation.
The mounting accessories for sun shades can be extra helpful here, ensuring your shading system is safely and professionally installed.
Connecting the Sail and Applying Tension
With the fixing points secure, it's time to attach the shade sail. This step usually involves using tensioners or turnbuckles.
- Attach the Corners: Connect each corner of the shade sail to its respective fixing point using the tensioners.
- Initial Tension: Apply a moderate amount of tension to each corner of the shade sail, working your way around to distribute the load evenly. One of the corners should have the lowest tension so that there's always a slope.
- Final Adjustment: Once all corners of the shade sails are attached, gradually increase the tension until the sail is taut and wrinkle-free. Using a ratchet on the tensioners can make this easier. Be careful not to over-tighten, as this can damage the sail or the fixing points.
- Check for Sag: Step back and assess the shade sail from all angles. Look for any excessive sag or areas where the shade fabric is rubbing against structures.
3. Cleaning and Care
Regular cleaning and maintenance are crucial to prolonging the life of your sail shade.
It prevents the buildup of dirt, algae, and other debris. Here's how to do it:
- Dry Cleaning: Use a soft brush to remove loose dirt and debris from the shade fabric. A long brush with soft bristles can remove much of the detritus before the wet clean.
- Rinsing: Rinse the sail thoroughly with a garden hose. For stubborn stains, you may want to consider using a mild detergent. Apply the solution and let the solution stand on the fabric for a few minutes before rinsing. Always rinse thoroughly to remove any residual detergent. Never use a power washer, as the high pressure can damage the fabric.
4. Fine-Tuning and Troubleshooting
Even with the best planning and installation, minor adjustments and troubleshooting may be necessary to achieve the perfect shade sail setup.
This section addresses common issues and provides practical solutions to ensure your garden sail provides optimal shade and enhances your outdoor space.
Addressing Sagging and Uneven Tension
One of the most common issues is sagging or uneven tension in the sail. This can occur due to stretching of the shade fabric, incorrect installation, or changes in weather conditions.
- Re-Tensioning: Regularly check the tension of the sail and re-tighten the tensioners as needed. Distribute the tension evenly across all fixing points to avoid placing undue stress on one corner of the shade. Ensure the load bearing is consistent across all parts of the sail.
- Adjusting the Height: Sometimes, adjusting the height of the fixing points can help to eliminate sag. Similarly, lowering one corner of the shade can improve rainwater runoff.
- Adding Additional Support: For larger sails, you may want to consider adding additional support poles or cables to prevent sagging.
Dealing With Wind and Weather
Shade sails are designed to withstand moderate winds, but strong gusts and extreme weather can pose a challenge. It's necessary to take precautions to prevent damage.
- Temporary Removal: If severe weather is forecast, it's best to temporarily remove the sail to prevent damage. Store it in a dry place until the weather improves.
- Reinforcing Fixings: Ensure that all fixings are securely anchored and capable of withstanding high winds. Use heavy-duty tensioners and reinforced cables.
- Angle Adjustment: Adjust the angle of the sail to minimise wind resistance. A flatter angle will reduce the surface area exposed to the wind.
Conclusion
Installing a shade sail isn't just about adding a shade structure — it's about transforming your outdoor space into a more inviting and functional area. From strategic planning and careful installation to routine cleaning and maintenance, each step contributes to the longevity and effectiveness of your sail shade.
By following this guide to help you, you'll provide the perfect shade in your conservatory or garden for years to come. So, go ahead, install your shade sail, and enjoy the sun-drenched days in comfort and style!
FAQs
Can I install a shade sail myself, or do I need professional help?
Even if you have little to no DIY skills, you can successfully install your shade sail yourself using a kit. Still, if you're unsure about any aspect of the installation, it's best to consult with a professional.
How much tension should I apply to my shade sail?
The tension will depend on the size and shape of your shade sail, as well as the weather conditions in your area. A general rule is to apply enough tension to remove any sag, but not so much that you risk damaging the sail or fixing points.
Can a shade sail be used as a waterproof shelter?
Most shade sails are designed to provide shade, not to be waterproof. If you need a waterproof shelter, look for specially designed waterproof sails. Nonetheless, ensure they are installed with sufficient slope to allow rainwater to run off. A hoist could also be useful so you can bring the sail down quickly when the weather takes a turn.
What is the best type of material for a shade sail?
The best material depends on your needs and budget. HDPE is a popular choice for its durability, UV resistance, and affordability. PVC is more waterproof. Consult with a supplier for tailored advice on options available to your needs.
Can I take down my shade sail during the winter?
It's generally recommended to take down your shade sail during the winter months, especially in areas with heavy snow or strong winds. Doing this will prolong the life of the sail and prevent damage.
When you want to take it down, do it on a clear, dry day. This way, it'll stay in good shape until the weather improves and it's time to do the montage once more.
Total reviews: 28 reviews